


An Overview of Key Film Production Roles

The Director

Tasks for the Director
If the producer is the engine of the ship, the Director is the captain steering it toward the horizon.
As a student director, your job isn't just to shout "Action!" and "Cut!" Your primary responsibility is to hold the creative vision of the film and guide every department—actors, camera, sound, and art—to bring that vision to life.
If you are stepping into the director's chair for your class project, here is your essential phase-by-phase task list.
Pre-Production (Translating the Page)
Before you step on set, you must know your story inside and out.
Establish the Vision (Lookbook/Moodboard): Collect reference images, color palettes, and clips from other films to communicate the exact "vibe" and emotional tone you want to your crew.
Create the Shot List: Work hand-in-hand with your Director of Photography (DP) to plan every single camera setup (e.g., Shot 1: Medium Shot of Sarah, Push-In).
Storyboarding: Sketch out key frames (especially complex moves like the push-in or pull-back) so you and the DP are completely aligned on the composition.
Character Breakdown & Casting: Sit in on auditions with your producer. Look for actors who don't just read the lines, but understand the subtext of the characters.
Actor Rehearsals: Meet with your actors before shoot day. Talk about their character's motivations, run through difficult scenes, and build trust so they feel comfortable taking your direction on set.
Production (Bringing the Vision to Life)
On set, your main focus is performance and visual storytelling. Trust your crew to handle the tech so you can focus on the screen.
Blocking the Scene: Before the crew lights the set, physically walk through the scene with your actors. Decide where they will stand, where they will move, and how the camera will track them.
Collaborate on Composition: Watch the camera monitor. Ensure the DP is utilizing the Rule of Thirds and that your camera movements (like push-ins and pull-backs) are emotionally motivated.
Directing the Performance: Give your actors constructive, actionable feedback. Instead of saying "Be angrier," give them a new perspective: "Act like you are trying to keep a massive secret from them."
Calling the Roll: Maintain the discipline of the set. Work with your 1st AD to call the shots:
"Quiet on set... Roll sound... Roll camera... [Wait for slate]... and... Action!"
The Final Word (The "Cut"): You are the only person on set who calls "Cut." Once you have a take you love, call "Print that" to let the script supervisor know it's a keeper, and move on.
Post-Production (The Final Rewrite)
They say a movie is written three times: in the script, on set, and in the edit suite. This is where you write it for the final time.
The "Director’s Cut": Sit down with your Editor. Review the footage, select the best performances, and shape the pacing and structure of the story. Be prepared to cut scenes that don't serve the momentum!
Sound Design & Music Spotting: Meet with your sound mixer or composer. Decide where music should swell to hit an emotional beat, where silence is needed, and where sound effects (like wind or a ticking clock) can build tension.
Color Grading Approval: Work with your Colorist to ensure the final image matches your original moodboard. Make sure the colors enhance the mood you set out to capture.
The Director's Golden Rule: "A director doesn't need to have all the answers; they just need to recognize the right ones." Listen to your crew's creative suggestions—collaboration is what makes a good movie great!
Tasks for the Producer:
The business and logistics boss. Producers secure funding, manage the budget, hire the crew, and make sure the project has everything it needs to succeed from start to finish.
Before a single camera rolls, you are laying the groundwork.

Script Breakdown: Read through the final script and list absolutely everything required: actors, specific props, locations, costumes, and special equipment.
Budgeting: Even on a $0 school budget, you manage resources. Track what needs to be borrowed, donated, or bought (like craft services/snacks or tape).
Securing Locations: Find and secure permission to shoot in specific classrooms, hallways, or outdoor areas.
Casting Coordination: Schedule audition times for your actors and make sure they receive their scripts (sides) ahead of time.
The "Call Sheet" Creation: Create and distribute the master schedule. This document tells the cast and crew exactly where to be, when to arrive, and what scenes are being shot that day.
Production (Running a Smooth Set)
On shoot day, your main job is to keep the chaos organized so the director can focus on the art.
Schedule Enforcement: Work closely with the 1st AD to make sure you aren't spending three hours on a single shot. Keep the train moving!
Craft Services (Food & Hydration): A hungry crew is an angry crew. Make sure there is water, snacks, and a planned lunch break.
Talent Management: Check in your actors, guide them to wardrobe/makeup, and make sure they are ready to step onto the set the moment the director calls for them.
Legal & Paperwork: Ensure every actor signs a talent release form and any location owners sign a location release. Without these, you can't legally screen your film!
Safety Marshal: Keep an eye out for tripping hazards, unsafe tripod setups, or anything that could injure your crew.
Post-Production & Distribution (Crossing the Finish Line)
The shoot is wrapped, but a producer's job isn't done until the audience is watching.
File and Asset Management: Make sure the camera operator or media wrangler safely transfers and backs up all footage to the editor's hard drive.
Timeline Tracking: Set strict deadlines with your editor, sound designer, and colorist so the project is finished in time for the grading deadline.
Clearances: Ensure all music used in the final cut is royalty-free, properly licensed, or created by a student composer.
The Big Release: Organize the final screening for your class, upload the film to the class drive, or submit your masterpiece to local youth film festivals!
The Producer's Golden Rule: "If something goes right, the director gets the credit. If something goes wrong, the producer fixes it." Embrace the hustle—you are the reason the movie actually gets made!
Tasks for the Cinematographer
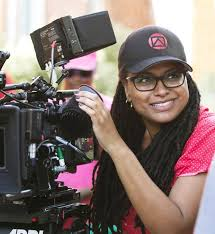
If the director is the visionary storyteller, the Cinematographer (or Director of Photography / DP) is the eyes of the production.
As a student cinematographer, your job is to turn the director’s ideas into stunning visual reality. You control the camera, the lenses, the framing, and the lighting to evoke the exact emotion the scene demands—whether that means setting up a tense Push-In utilizing the Rule of Thirds, or designing a moody lighting setup.
Here is your step-by-step task list to master your role on the student crew.
Pre-Production (Designing the Look)
Great cinematography is 80% preparation and 20% execution. Do the heavy lifting before shoot day.
Deconstruct the Moodboard: Sit down with the director to review their references. Translate abstract emotional terms (like "lonely," "tense," or "dreamy") into technical solutions (e.g., cool-toned lighting, wide lenses, or shallow depth of field).
Draft the Shot List & Storyboards: Partner with the director to plan every shot. Determine which moments require static camera placements and which require motivated movements like a Push-In or Pull-Back.
Location Scouting (Tech Recce): Visit the shooting locations ahead of time. Note where the natural light comes from, where the power outlets are, and what gear you will need to bring to control the environment.
Choose the Gear & Settings: Select your camera body, lenses, and tripods. Decide on your camera settings:
Resolution: Shoot in 4K or higher if you plan on doing digital reframing or post-production zooms.
Frame Rate: Typically 24fps for a cinematic look.
Aperture/f-stop: Decide how blurry you want your background to be.
Production (Capturing the Frame)
On set, you are the department head managing the camera and lighting crews. Your goal is consistency and visual excellence.
Collaborate on Blocking & Lighting: Watch the actors walk through their physical movements. While they rehearse, work with your Gaffer (lighting) and Key Grip (rigging) to set up the lights and camera supports.
Composition & Grid Alignment: Set up your framing. Turn on your camera’s internal grid lines and lock your subject’s key elements (like their eyes or the horizon) onto the Rule of Thirds intersection points.
Execute Motivated Camera Movement:
Using gimbal, tripod, Dolly, shoulder mount etc.
Manage Visual Consistency: Check your exposure (using tools like false color or histograms) and white balance on every single setup. Make sure the footage from Shot A will seamlessly match the footage from Shot B.
Check the Gate: After a great take, verify that the shot was perfectly in focus, there were no stray boom mics in the frame, and the lens was clean before moving on to the next setup.
Post-Production (Polishing the Image)
Though your hands-on camera work is done, your creative supervision continues in the editing bay.
Review the Assembly Cut: Sit with the director and editor to review how the shots flow together. Ensure the visual pacing and continuity of your compositions work across the edit.
Guide the Color Grade: Collaborate with the Colorist (often in DaVinci Resolve). Ensure the final color grading matches the lighting, contrast, and color palette you designed during pre-production.
Troubleshoot Digital Reframing: If any shots need a digital counter-zoom, assist the editor in matching the physics of your physical camera movement with smooth digital keyframe curves.
The Cinematographer’s Golden Rule: "Beautiful lighting on a meaningless shot is wasted. Every frame, every shadow, and every camera movement must serve the story." Frame with purpose!
Tasks for the Actor
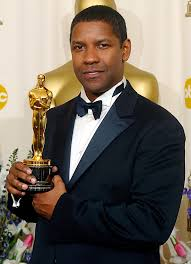
If the producer is the engine, the director is the captain, and the cinematographer is the eyes, then the Actor is the emotional heart of the film.
As a student actor, your job is much more than just memorizing words on a page. You are translating the director’s vision into raw, believable human emotion. Furthermore, because film is a highly technical medium, you have to deliver those deep emotions while being hyper-aware of camera frames, lighting, and movement.
Here is your step-by-step task list to help you deliver a killer performance while being a dream collaborator on set.
Pre-Production (Character & Preparation)
The secret to great acting is doing the homework before you ever step in front of the camera.
Analyze the Script (The "Why"): Read the script multiple times. Don't just look at your lines—look at what your character wants in every scene (their objective) and what is standing in their way (the obstacle).
Find the Subtext: What is your character actually saying beneath the words? If the line is "I'm fine," but the character is secretly heartbroken, how do you show that conflict?
Memorize Your Lines (Cold): You cannot truly act if you are struggling to remember what word comes next. Memorize your lines so deeply that you can say them while brushing your teeth or doing dishes. This frees your brain to react naturally to your scene partner.
Build a Backstory: Create a life for your character outside of the script. Where did they grow up? What are their fears? This gives your performance layers and makes your character feel like a real, three-dimensional person.
Collaborate in Rehearsals: Meet with the director to discuss your character. Try different ways of delivering lines and get comfortable working with your fellow cast members.
Production (Technical Acting on Set)
Acting for film is a sport of inches. You must balance deep emotional truth with strict physical discipline.
Hit Your Marks: The camera crew will place tape on the floor (marks) to show you where to stand so you are in focus and perfectly lit. You must find these marks without looking down at the floor. If you miss your mark, you might be completely blurry!
Understand the Frame & Camera Movement: Ask the DP what kind of shot it is.
Maintain Continuity: Film scenes are shot out of order and from multiple angles. If you pick up a coffee cup with your right hand on a specific word during the wide shot, you must do the exact same thing on the exact same word during the close-up. If you don't, the editor won't be able to piece the scene together!
Be Adaptable to Direction: The director might ask you to try a line a completely different way (e.g., "Try this take as if you are laughing at how ridiculous this is"). Don't get defensive; be playful and willing to experiment.
Stay in Character Until the "Cut": Never stop acting because you think you made a mistake or because you think the camera isn't on you. Keep going until the director physically shouts "Cut!"—sometimes your accidental, unscripted reactions are the best moments in the movie.
Post-Production & Wrap (The Final Polish)
Your physical performance is captured, but there are a couple of final steps to bring the character to the finish line.
ADR (Automated Dialogue Replacement): If the production audio on set was noisy (e.g., a loud airplane flew over during your best take), you may need to go into a recording studio with the sound editor. You will watch your performance on screen and record your dialogue again, matching your voice perfectly to the movement of your lips.
Support the Release: Help the producer and director promote the film! Share behind-the-scenes photos, attend the class screening, and celebrate the hard work of the entire crew.
The Actor’s Golden Rule: "Acting is reacting." Don't just wait for your turn to speak. Listen intently to your scene partner, look them in the eyes, and let their performance naturally change how you deliver your next line.
Tasks for the Head Lighting Technician (or Gaffer)

If the cinematographer is the visual designer of the film, the Gaffer (Chief Lighting Technician) is the person who physically makes those designs shine.
As a student gaffer, you are the master of light and power. Your job is to translate the Director of Photography’s (DP) vision into physical setups—placing fixtures, shaping light, and ensuring the set remains completely safe. Whether you are creating a moody, high-contrast look for a thriller or making sure a character stays perfectly lit during a dramatic Push-In, you are the key to the film's visual atmosphere.
Here is your step-by-step task list to help you light up your next class production like a pro.
Pre-Production (The Lighting Blueprint)
Great lighting is carefully planned. Work closely with your DP to build a plan before anyone touches a light stand.
Consult with the DP: Review the shot list and moodboards. Discuss the emotional tone of each scene. Ask key questions: Is the lighting soft or harsh? Warm or cool? Where is the imaginary light source (the "key light") coming from?
The Tech Scout (Power Check): Visit the shooting locations ahead of time. Locate the breaker boxes and wall outlets. Calculate how much power your lights will draw so you don't accidentally trip a breaker and plunge the school into darkness!
Build the Lighting Gear List: Inventory your class equipment. Put together a package of what you need: LED panels, hot lights, C-stands, extension cords, sandbags, diffusions, and color gels.
Draw Lighting Diagrams: Sketch out quick top-down maps of the scenes (lighting plots). Show exactly where the camera, the actors, and each light fixture will stand.
Production (Painting with Light & Staying Safe)
On set, you are the boss of the electrical department. Speed, precision, and safety are your top priorities.
Establish Power Distribution: Lay out your extension cords safely. Run cables along walls rather than across walkways, and use rubber mats or gaffer tape to cover any cables that people must walk over.
Set the Three-Point Lighting: Position your fixtures to build a classic setup:
Key Light: The primary, strongest light shining on your subject.
Fill Light: A softer light placed on the opposite side to control shadows.
Backlight (Rim Light): A light behind the subject to separate them from the background.
Shape and Control the Light: Don't just turn on a light and leave it. Use barn doors, flags, foil (black wrap), and diffusion sheets to bounce, soften, or block light so it only goes exactly where the DP wants it.
Adjust for Camera Movement:
Make sure your light stands are placed far enough back so they don't accidentally appear in the wider frame.
Check that the actors don't walk through "hot spots" (areas where they become extremely overexposed) as they move closer to or further from the camera.
Communicate Safety Commands: Always yell out warnings to the crew when handling lights:
Yell "Sparking!" before plugging in or turning on a high-powered light.
Yell "Hot light!" or "Striking!" to let people know a fixture is on and hot to the touch.
Ensure every light stand is weighted down with a sandbag on the tallest leg.
Wrap (The Safe Strike)
While the gaffer doesn't have post-production editing duties, your job isn't finished until the gear is safely packed away.
Cool Down the Fixtures: Turn off any traditional hot lights first so they have time to cool down before you pack them. Touching a hot bulb or housing can cause nasty burns!
The "Strike" (Teardown): Safely disassemble the lighting setups. Lower light stands slowly so they don't crash down, and remove sandbags last.
Proper Cable Management: Never messily bunch up extension cords. Wrap them using the professional "over-under" method so they don't get tangled or damaged for the next class.
Inventory Check: Make sure all bulbs, barn doors, power bricks, and adapters are packed back into their correct cases before returning them to the classroom equipment closet.
The Gaffer's Golden Rule: "Safety first, art second." A beautifully lit scene means nothing if a light stand falls over or a cable trips an actor. Keep your set clean, your cables taped down, and your stands sandbagged!
Tasks For the Production Designer

If the cinematographer is the eyes of the film, the Production Designer is everything those eyes actually see.
As a student production designer, you are the ultimate world-builder. Your job is to design the physical environment of the movie—the sets, props, costumes, and color schemes. You are responsible for making a boring classroom look like a high-tech hacker den, a tense interrogation room, or a messy teenage bedroom. You give the film its physical texture and visual personality.
Here is your step-by-step task list to help you build a stunning, believable world for your next class shoot.
Pre-Production (Designing the World)
Great production design starts on the page. Before you buy, build, or borrow anything, you must plan the visual style.
Do a Visual Script Breakdown: Read the script specifically looking for "art" requirements. Highlight every mention of a prop (e.g., Sarah drops a silver key), costume detail (John wears a muddy jacket), or set description (a cluttered, dusty desk).
Collaborate on the Color Palette: Sit down with the director and DP. Decide on a cohesive color scheme. (For example, using cool blues and grays to represent sadness/isolation, or warm oranges and reds to represent comfort or danger).
Create the Art Moodboard: Gather reference images of set layouts, furniture styles, costumes, and overall textures. Ensure your vision aligns perfectly with the director's narrative goals.
Source Your Props & Wardrobe: This is where you get creative! Since student films usually have a $0 budget, your job is to scavenge. Raid your closets, visit thrift stores, ask friends to borrow items, or craft props out of cardboard and paint.
Plan Set Modifications: Figure out how you will transform your shooting locations. If you are shooting in a school hallway but it needs to look like a hospital, what signs, posters, and props do you need to bring in to sell the illusion?
Production (Dressing the Set & Managing Props)
On set, you are the first to arrive and the last to leave. Your job is to make sure the physical space tells the story before the actors even speak a line.
Dress the Set (Set Dressing): Arrive before the camera crew. Arrange the furniture, hang posters, place books on shelves, and scatter "lived-in" clutter. Ensure everything looks natural and fits the character who occupies that space.
Watch the Camera Monitor (Frame Checks): Look at the camera frame with the DP.
Ensure there are no distracting background elements (like a bright fire extinguisher or a modern trash can in a historical scene).
Make sure key background props line up beautifully with the Rule of Thirds grid to create balanced compositions.
Act as the Prop Master: Keep a dedicated table for hand props. Keep them organized, clean, and ready. Hand them to the actors right before the camera rolls, and take them back immediately after the director calls "Cut."
Manage Art Continuity: Work closely with the script supervisor. If an actor takes a bite out of an apple in Shot A, you must make sure they have a matching apple with the exact same size bite taken out of it for Shot B. If a chair is slightly angled, make sure it stays in that exact spot for every single take.
Wrap (Leaving No Trace)
Once the director calls "Wrap," your final—and most important—job begins.
Strike the Set: Carefully dismantle your set decorations. Take down posters, pack up props, and move furniture back to exactly where it was before you arrived.
Respect the Location: Leave the shooting space cleaner than you found it. Throw away any trash and sweep up any dirt or debris tracked in by the crew.
Return Borrowed Items: Make sure every borrowed prop, costume, or piece of furniture is safely returned to its rightful owner in perfect condition.
Inventory and Store Art Supplies: Pack away reusable props, fabrics, and tools into your classroom's art bin so they are ready for the next group's project.
The Production Designer’s Golden Rule: "Every prop tells a story." If an item in the frame doesn't tell the audience who a character is, where they are, or what they are feeling, it is just clutter. Make every single item in the background earn its place in your frame!
Tasks for the Foley Artist
While the Production Sound Mixer captures the dialogue on set, they rarely capture the tiny, tactile sounds of the physical world—like the rustle of a jacket, the clink of a coffee cup, or the crunch of footsteps on gravel. In fact, most of these sounds are completely stripped out during editing to make the dialogue clean.
Enter the Foley Artist.
As a student Foley artist, you are the ultimate sound magician. Working in post-production, your job is to recreate every single physical sound effect in sync with the edited footage using a variety of random, everyday objects. You give the film its realism, texture, and physical weight.
Here is your step-by-step task list to bring the physical world of your film to life through sound.

Pre-Production & Prep (The "Spotting" Session)
Before you grab any props, you must analyze the edited film to figure out exactly what sounds are missing.
The Spotting Session: Sit down with the director and editor to watch the locked cut of the film. Pause frame-by-frame and make a master list (a "Foley Cue Sheet") of every single sound that needs to be replaced or added.
Categorize the Cues: Organize your sound cue sheet into the three main pillars of Foley:
Footsteps: Who is walking? What kind of shoes are they wearing (sneakers, boots, heels)? What surface are they walking on (wood, concrete, grass)?
Moves (Rustles): The sound of clothing moving as characters walk, hug, sit down, or struggle.
Specifics (Props): Touching a doorknob, putting down a glass, opening a backpack, or pulling out a sword.
Scavenge for Props (The Foley Kit): Raid your house, the classroom, and the recycling bins for weird objects that make interesting noises.
Need the sound of grass crunching? Grab a cassette tape and pull out the magnetic ribbon.
Need bones snapping? Celery or dry pasta works perfectly.
Need a heavy punch? Slapping a raw piece of meat or a wet leather glove onto a table does the trick.
Recording (The Foley Stage Performance)
Foley is a performance art. You aren't just making noises; you are acting out the sounds in perfect sync with the characters on screen.
Set Up Your Recording Space: Find a quiet room (like a closet or a carpeted classroom after school) to minimize background noise. Set up your microphone (ideally a highly sensitive condenser microphone) and a screen where you can watch the movie.
Record Footsteps (The "Foley Walker"): Put on the same type of shoes as the character on screen. Watch their feet on the monitor and walk in place in perfect sync with their steps. Mimic their weight and emotion—if they are tiptoeing nervously, step lightly on your toes; if they are angry, stomp heavily.
Perform the "Moves": Hold a piece of fabric (like a denim jacket or a nylon windbreaker) close to the microphone. Watch the actor on screen and rustle the fabric in time with their body movements.
Execute the Specifics: Perform the prop interactions in real time. If a character drops a keys on a table, drop your keys onto a similar hard surface exactly when it happens on screen.
Watch Your Levels: Make sure your microphone sensitivity (gain) is high enough to capture quiet details (like a finger tapping a table) but won't clip or distort during louder sounds (like a door slamming).
Post-Production (Editing & Mixing)
Once your sounds are recorded, they must be polished and tucked seamlessly into the movie's soundtrack.
Nudge and Sync: Even if you performed the sounds in sync, go into your editing software (like DaVinci Resolve’s Fairlight tab) and precisely align the audio waves to the exact frame where the action happens on screen.
Adjust Volume & Perspective: Foley should be felt, not necessarily noticed.
If a character is far away in the background, lower the volume of their footsteps and add a little reverb (echo).
If they are in a tight close-up, bring their clothing rustles and breathing closer and clearer.
EQ and Filter: Apply Equalization (EQ) to make the recorded sounds blend in naturally. Cut out extremely low hums or harsh high-pitched frequencies so your Foley sounds like it was captured right there on the actual set.
Export and Deliver: Group your Foley tracks neatly, label them clearly (e.g., FOLEY_Footsteps_Sarah, FOLEY_Cloth_Moves), and hand them off to the sound editor or director for the final master mix.
The Foley Artist’s Golden Rule: "The best Foley is the Foley you never notice." If the audience is distracted by a sound effect, it's too loud or poorly timed. Your goal is to make the sound so natural that the audience completely forgets it was made by a student rustling trash bag strips in a broom closet!

Comments